Showing posts with label sewing. Show all posts

Tuesday, March 27, 2012

the importance of pictures

I'm so annoyed with myself.  I made an awesome pillow for a friend of mine, for her birthday.  I took a couple of pictures during it, because I wanted to write a nice blog post about it.  And now I can only find one of the pictures.  And it's not even of the completed project.  Grr!  Well, let this be a lesson to me, to keep my photos better organized.

My friend loves scrabble.  So I thought it would be fun to make a scrabble pillow!  I took her and her husbands name, their 'theme' of happily ever after and some other important words, like love and hope and made a fabric scrabble board.  Here's how the pillow top looked.

The letters were stenciled on with hand made stencils. I sponged the paint on, but if I made this again, I would probably draw the letters with a black sharpie. It's not an exact replica of a scrabble board, but not too far off!

I'm bummed I don't have a completed picture to show off right now.  One of these days, when I go to my friends house, I'll take a picture there.

In other crafty news, I found my next sewing class.  It's at Vogue Fabrics and the class will start in May.  It's a 'beyond beginner' class that will focus on cuffs, and sleeves, and darts and all sorts of good things.  It'll be a trek, the place is in Evanston, which is a half-hour drive, but I'm sure it'll be worth it.  Especially since it will get me closer to my goal...

Which is this.  In six months, I want to be able to make a Jane Austen dress. I already have the pattern.  I couldn't resist once I saw all the patterns at Sense and Sensibility.  Now I just need the skills, which I'm slowly acquiring!

Saturday, March 10, 2012

I can haz pincushion?

On a whim in my local Joann's, I saw some fat quarters on sale.  So I decided to make a pin cushion.  And I decided not to use a pattern and instead improvise.  Here's what I started with.

All I knew when I sat down to make this was that I wanted to use piping.  I had never made or used piping until I had made my cape, and thought that a pincushion would be a good way to practice with it.

This certainly wasn't the easiest thing to make.  I had hoped to make most of it using my machine, but I ended up making most of this by hand.  Took me a few times, not to mention several uses of the seam ripper until I got this looking the way I wanted it to.


Cute, huh?  I desperately needed a pincushion, so at least that's off the list.  In other news, I posted on facebook about organizing a facebook quilting bee.  Basically I would supply the fabric and the notions for a block of a quilt, then send them to whoever wanted one.  Then they can send me back a completed block.  I think it sounds like a lot of fun!

Monday, March 5, 2012

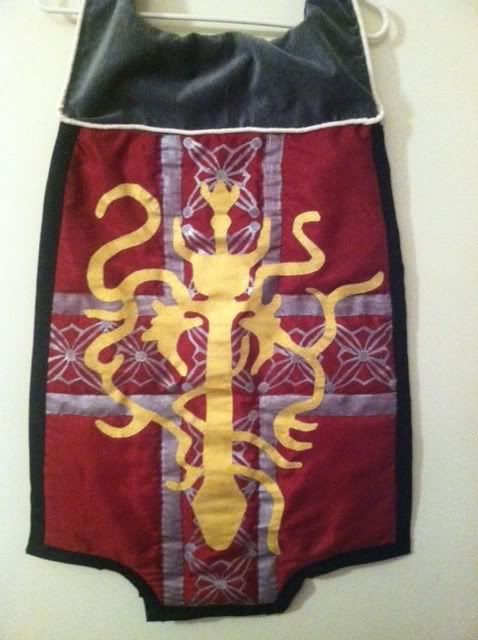
Guild Wars Cape


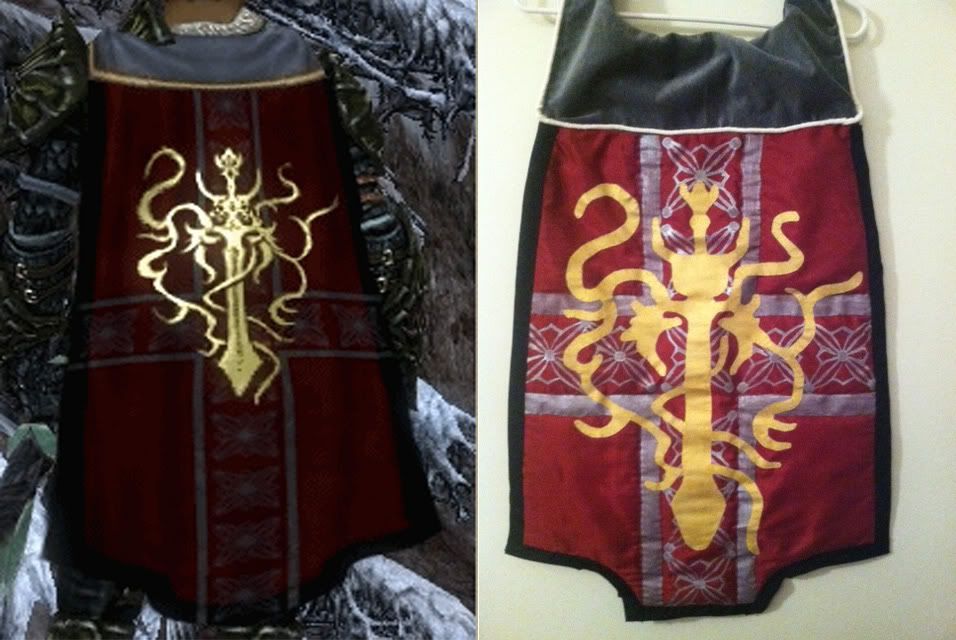
One day I was talking to my fellow guild members in vent.  I don’t remember what we were talking about, but I do remember that I told them that I was thinking of making our guild’s cape. 

Which wasn’t exactly true.  I hadn’t given it one moment’s thought.  The idea simply popped into my head and I blurted it out before I could stop myself.  I chalked it up to one of those random things that’s said in chat and I expected to forget about it quickly.  But the thought didn’t go away.  I found myself thinking what I would need to make the cape real.


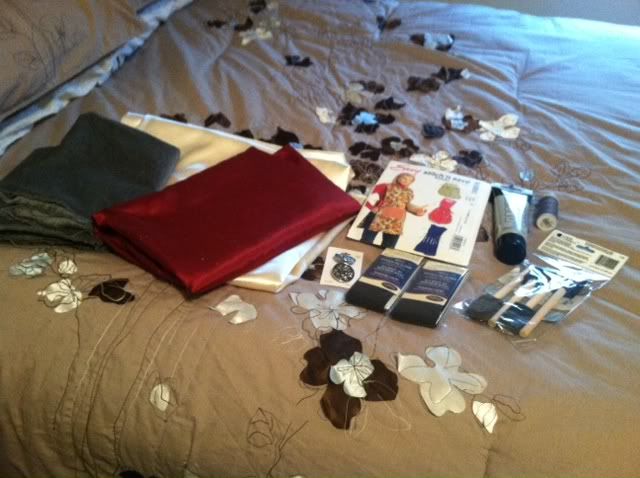
And so the next day I went to a fabric store and got the supplies I thought I needed.


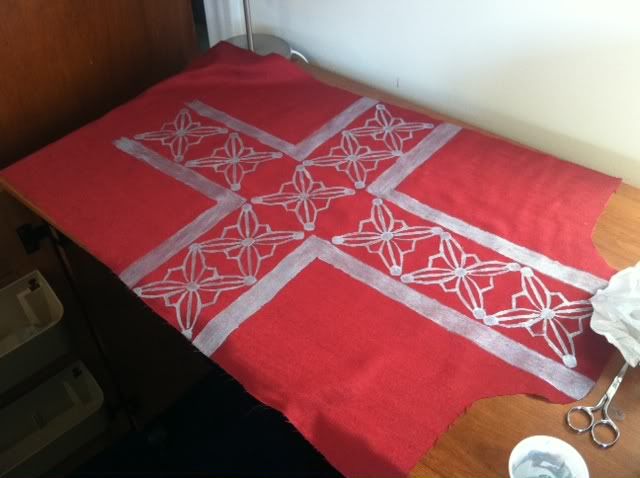
The first part of the cape went smoothly.  I got the pattern from an apron pattern that had the right shape.  Painting the silver on was easy.  I made a stencil and was done quickly.


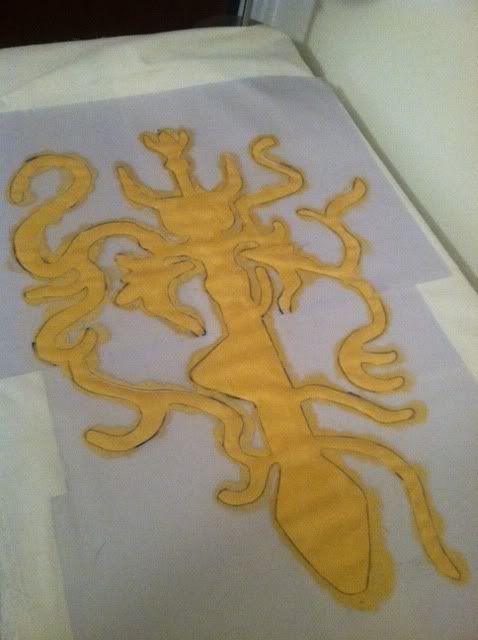
The part that I knew would trip me up the most was the emblem on the cape.  I went about this a couple of different ways.  First, I was going to make a stencil and then cut out the fabric and sew it onto the cape.  I quickly realized that wouldn’t work with my fabric, as there was no way I would be able to press the emblem and keep the detail that I wanted. 

So I thought perhaps I would cut the fabric right on the line and sew it on the cape.  That wouldn’t work either, as the fabric frayed horribly.  It was back to the drawing board.

What I decided to do was make the stencil and paint some plain muslin fabric gold.  Once it’s dry, I’d cut about ¼ of an inch around the paint and then sew where the white and gold meet.


That didn’t quite work out the way I wanted.  I couldn't sew underneath easily, like appliqué.  Luckily, I realized the fabric wasn’t fraying at all because of the paint.  So I cut directly around the painted area and sewed that onto the cape.

Next was the top of the cape, including the part that goes around the neck.  I was very excited, because this would be the first time I was going to use my sewing machine’s buttonhole feature.  Set everything up, pressed the ‘go’ key, and quickly discovered that the combination of my fabric and thread was no good for buttonhole making. I therefore hand made quite possibly the world’s worst buttonhole.  But there was a hole and it was for a button and in the end, isn’t that all that matters?

After that it was time to quilt the cape itself.  I took the same grey thread that wasn’t good for buttonhole making and quickly quilted around the silver lines.  Then I added the black quilting bias.

Everything was going so smoothly until that point.  I was really happy with how it was going.  Then I realized I made a logistical error.  I made my piping, and promptly realized I should have attached it about 5 steps beforehand, when I was sewing the grey top part.  There was no way I was going to go back and fix that error.  So I made a work around.  I already knew that this cape was for displaying, not for wearing, so I just stitched it to the back.  Works for me!

I learned a lot making this cape, and I made notes throughout the process, figuring out what I would do differently next time.  I had an absolute blast making this.  It has been a while since I made something for myself, just because.  Lately, most of my crafting has been for other people, which I love, but it is nice to make something for me.



Wednesday, February 8, 2012

And the apron is complete!

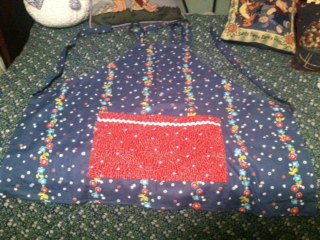
Huzzah!  I completed my apron from sewing class tonight.  The two steps left were sewing on the ric-rac and then the bottom pocket.  I'm pretty pleased at how it turned out!


I tried to get a hint of a retro look with the fabric  and the ric-rac.  One thing I will pat myself on the back about is the top pocket.  I was able to line up the fabric so well you can't even see the pocket from the picture!

Monday, January 23, 2012

new set up!

My original sewing area simply had a sewing machine on a card table.  Then in my first sewing class, my teacher goes, "Never ever sew on a card table.  They're too unstable."

Oops.

My mom and I then brainstormed what to do.  We thought perhaps a desk.  I found some pamphlets for arrow sewing cabinets and fell in love.  Then checked the prices online and discovered they were far far far out of my budget.  So I started scouring craigslist.  And within a day found someone offering a brand new sewing cabinet that hadn't even been taken out of the box yet.  Yay!

I picked it up and spent close to four hours putting it together.  (It was a beast!)  I'm absolutely thrilled with the finished product.


I took it out for a test drive this evening and it works great.  Only downfall is that when I extend the arm fully, I have to keep my door closed, but that's not the end of the world.  Sort of makes me feel like a real sewer!

Monday, January 9, 2012

What's a Few Years Between Friends?

Way back in high school, I heard of someone taking all of their high school t-shirts (from band, plays, etc.) and having it made into a quilt.  I thought that was the coolest idea ever, and even though I didn't know how to make a quilt back then, I immediately resolved that I would do the same.

15 years later...

I have these two plastic storage dressers.  I bought these dressers in college, and decided to put all my high school t-shirts and various musical t-shirts in them.  That way, when I decided I finally had the time, I'd make that quilt.  Well, these dressers became the bane of my existence.


They were with me for a total of 3 apartments and the stint living with my parents.  I drew the line at moving them to California, when I lived there.  At some point, I did actually start the quilt.  I bought fabric and drew lines where I wanted the t-shirts cut.  (My present crafter me wants to smack past crafter me.  I must have been very impatient).  I even cut out a few t-shirts.  But then I stopped.  And even more years passed.

Until tonight.  I have a number of unfinished projects that I've decided I have to finish.  I swear, it's like I have crafting ADD sometimes.  But this quilt has been the biggest weight dragging my crafting spirit down for the longest time and I'm ready to kick it to the curb!

Here's where I'm at.  All the shirts have been cut into squares.  I highly doubt that they are all the same size.  So tomorrow I'm going to iron all of the shirts.  (Cause past crafter me was apparently too good to iron them before I started marking and cutting them...)  Then I'm going to take my tape measure and start measuring.  Get them to all the same size.  Then I can start figuring out the boarder fabric.  Wonder where my rotary cutter is?

And better than all of this?  Those plastic dressers are empty!  They're getting donated to good will tomorrow.

Saturday, January 7, 2012

Not Accepting Failure!

The other day I sat down at my sewing machine, thinking that making doll clothes would be an absolute breeze after making Fred.  I cut out the pattern and the fabric and I was ready to go!  Then I started reading the instructions.  And realized I might be a bit over my head.  

I know how to sew.  I've made a king sized quilt years ago and a number of baby blankets.  But I've never made a piece of clothing before.  The markings on the pattern confuse me a bit to be perfectly honest.  Being so excited about starting this sewing adventure that I am, I don't want to self teach myself into horrible habits that will need to be broken later.

So what to do?

I enrolled in a sewing workshop.  I'm incredibly excited about it.  After a number of attempts of using the internet to find a sewing school, I finally found The Harlem Avenue Sewing Center.  Most of the other places are to close to downtown Chicago for my taste, or way out in the suburbs.  This place is in a perfect location for me.  

The workshop is three two hour sessions, once a week.  It starts next week and I can hardly wait.

Friday, December 30, 2011

Meet Fred

Ta-da!


I think he looks pretty darn cute, in my humble opinion.  More importantly, my sister thinks he looks great, which means he can be given to the baby when it's born.  This is just about the perfect size.  It'll be a bit big for a newborn, but as the baby gets older, it'll totally be a huggable stuffed animal. 

Next up is some doll clothes.  This is something I'm very excited about.  It's just a simple jumper and blouse, but I have a feeling it might be challenging, considering I've never really made clothes before.  We'll see!

Monday, December 26, 2011

It's beginning to look a lot like a hippo...

I'm getting there!


I kinda think it looks like a cow in the above picture.


This looks more like a hippo, me thinks.  Or maybe a dog.

I'm oh so close to finishing this, but I truly don't feel like doing anymore tonight.  So I'm stopping.  Tomorrow I'll put in all the stuffing and sew him up.  Then we can decide if he's good enough to give as a gift!

Saturday, December 24, 2011

Saner Heads Prevail

So I was able to convince my sister that a giant, and do I mean giant hippo might not be the best present for the newborn.  I mean, the hippo would have probably been twice the size of the baby.  Which might have provided some amusement, but not nearly enough for the effort.  It was then decided that the small version of the hippo would be best.  

I've actually learned a great deal so far.  First off, cutting out the pattern, then the fabric, then the interface kinda seems like a waste of time.  Is it possible to do all three at once?  Pin them all together and just cut?  I think I'm going to try that next time, cause I've put in a whole lot of effort and haven't even turned my machine on yet.  

Here's where I'm at:

Next I need to figure out how to transfer the markings to the fabric.  I bought both tailor's chalk and a marking pen today so hopefully one of those will work.  Then tomorrow (possibly, seeing that it's Christmas and all) I might be able to actually start sewing.

Friday, December 23, 2011

More than I can Chew?

Oh my.

A friend of my sister is having her second baby in about a month.  For the first baby, I crocheted a gorgeous white and raspberry baby blanket.  I was incredibly proud of the end result.  I had assumed that I would make another baby blanket for this baby.  My sister, however, had other ideas.


She wanted a stuffed animal.  Now, one of my goals for 2012 is to really learn how to sew.  So when I found this pattern, I thought, perfect!  I would be able to practice my skills easily with this pattern.  This evening I decided that it was time to start.  I took out the pattern...


It's freaking huge!  I must admit, I'm sort of scared to make this.  There are darts, and all sorts of sewing techniques that I haven't tried in years.  If I can pull this off, my confidence in my sewing abilities will soar, that's for sure!  Tonight my goal is to get all the fabric cut, not the interface, though.  Then I'll most likely put everything aside for a couple of days for Christmas.  And then it's right back to work.